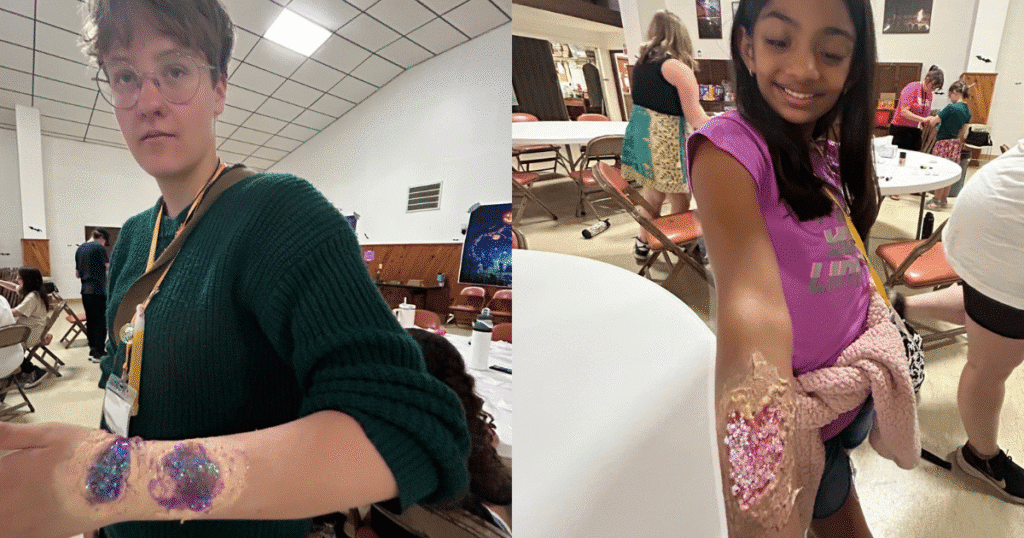
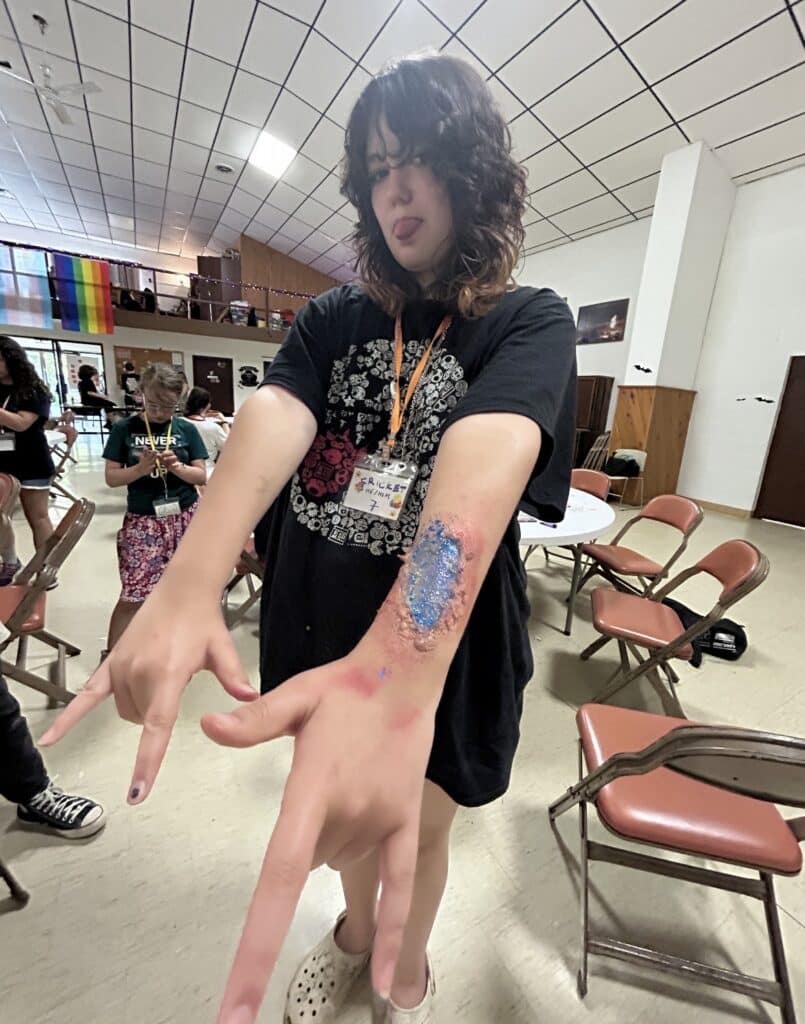
HONAB, or the House of Nails and Beautification is a popular activity across our network, where campers and staff of all identities come together to play and experiment with makeup, nail polish, temporary tattoos, hair chalk, and more.
Special Effects HONAB is a twist on this, with more of a tutorial feel towards the beginning of the block. Campers are led through a simple guide on how to make a special effect “wound” on the back of their hand that is easily peeled off.
Campers had a blast getting creative with glitter and rainbow colors to make “unicorn bites”.
Volunteers and makeup enthusiasts, here’s how to do it:
Special Effects Makeup Tutorial Camp Activity
Materials:
- 3 14 oz. bottles of liquid latex
- 4 boxes of tissues
- A few paper plates to put materials on in center of table, and plates for foundation mixing
- 6 bottles of foundation- some light, some medium, and some dark
- rainbow eyeshadow palettes
- Q-tips
- Cheap latex makeup sponges/wedges
- Glitter gel
Process:
- Instruct campers to make their “wound” on the top of their hand, or on their arm or leg. Taking it off will feel a bit like a bandaid coming off, so it may be wise to pick an area where you don’t have much hair.
- Dip a makeup sponge into the liquid latex, and create a thin layer in the shape of the “wound” on the skin.
- Instruct campers to make their “wounds” no bigger than a credit card, we don’t have a ton of liquid latex and want to give as many people the chance to participate as possible.
- Emphasize that the layer must be thin, or it won’t dry properly or look as good.
- Rip apart small sections of the tissue and roll into worm-like rolls. Apply the rolls of tissue to your skin into the outline of the wound you want to create. Once you’re happy with the placement, use the sponge to apply a thin layer of liquid latex to blend out the edges.
- At this point, campers may choose to add additional tissue and latex to the “wound”
- When you’ve added all of the tissue and latex that you’re going to, use the Q-tips and the eyeshadow to color the inside of the “wound”. Encourage campers to use rainbow colors.
- Dip a makeup sponge into the appropriately colored foundation and paint the outside of the “wound” (the liquid latex+tissue part). Mixing foundations to color match may be necessary.
- Optional: apply glitter gel
- Note: if a camper is removing their “wound”, make sure they peel everything off that they can before washing in the sink, in order to protect host camp plumbing.
Have fun!
